frncscgmz

On the Subject of Code and other Musings (vowels not included)

Siege and AB: Tools for Stress

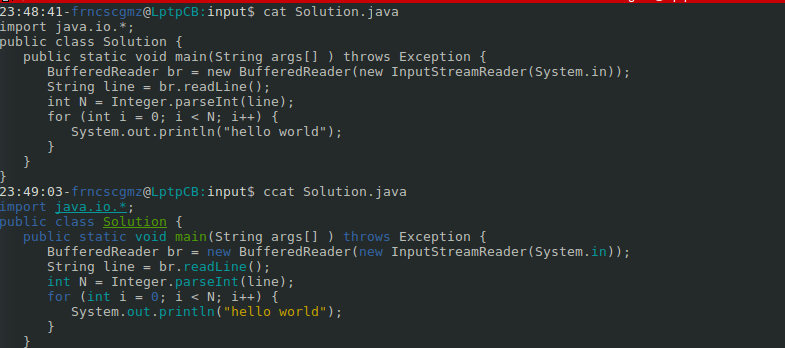
Most of the time unit testing and integral test just aren’t enough, specially when you’re working on exposed applications where you have no exact idea how much they’re gonna be used or if they have to do long and heavy processing concurrently. I learned that the hard way, and I’m pretty sure I’m not the only one who went through a similar ordeal.

Enter the Stress Test.

Stress testing, as the name implies, consists in thoughtfully and deliberately testing the stability of a system often to the breaking point of it. This task may seam like a drag to most programmers, specially if they’re working with a QA team. Theres no shortage of articles and opinions saying how testing is the responsibility of the developers too, and I want to prove that this kind of tests are not necessarily a hindrance or a waste of time, they can be pretty fun!

I’ve used two really handy tools for my stress tests on HTTP servers (REST services more specifically).

Siege

The first one is Siege, its a fantastic open source benchmarking and load-testing tool for any of the *Nix flavors. Siege is packaged in Debian based distributions so you can just installed directly from the repositories, if not you can always get the latest version from the official Siege repository.

Once installed, Siege is incredibly easy to use. If you’re familiar with “Unixy” applications you’re gonna love Siege.

If you want to simulate 30 simultaneous users hitting a single service/page with a delay of 5 seconds between each hit for 2 minutes this should do the trick:

siege -d5 -c30 -t120S http://website.com/hello.php

The -c flag tells Siege how many simulated users will be executing the service concurrently. -d indicates the delay in seconds between each “user” hitting the service. -t tells Siege for how much time will the test run until it stops (if this flag is not provided Siege will continue to run until its interrupted manual, Ctrl-C most of the time). And finally the URL of the service/website.

Its also possible to run a suite of different services in a single test instead of running them individually. You can specify a list of URL’s in a text file and use it for your tests, Siege will execute each service one by one or at random.

siege -d5 -c30 -t120S -i -f sitetest.txt

Most of these commands should be familiar except the last 2, -i generates user simulation by randomly hitting the URL’s in the text file which is specified using the -f flag.

While siege is running, each hit prints simple yet detailed information about the request sent/received. Protocol used, response, delay of response, response size and finally the service that its consuming. When the Siege test its over, a small recap is displayed of the test results, for me this is one of the best things about Siege, it gives you straight data which is easy to understand.

ab - Apache Bench

ab is another fantastic benchmarking tool made by the good folks at Apache. As Siege, this tool also comes packaged in most Debian based distos and it’s a requirement for most of Apache’s server tools.

ab is also easy to jump on but it has a lot more depth than Siege on the things yo can do with it. Here’s the previous test we ran on Siege but now using ab with some slight differences:

ab -n200 -c 30 http://website.com/hello.php

For consistency’s sake, the -c flag indicates the number on concurrent “users” hitting your service. -n sets up the number of requests the test must complete before finishing the test. You can also use a time limit instead of request limit using the -t flag, it works just like the -t flag in Siege except ab takes time in milliseconds.

One thing I was able to do in ab that I couldn’t in Siege was testing POST services which required a JSON file in its request.

ab -n200 -c 30 -p {"jsonfile":{"value":"the-value"}} -T "application/json; charset=utf-8" http://website.com/hello.php > testresults.log &

There’s a little more wizardry going on in this one. -p indicates a file(JSON file in this case or a regular file when the path is present) containing data to POST. -T sets the Content-Type header for POST/PUT data, if you’re using the -p flag for posting it’s necessary to setup the Content-Type header.

Unlike Siege, ab prints the test results only when everything has finished, thats why we are using a “>” option to print all out results to an external file. And finally the “&” character it’s a pretty standard option in Unix environments, this indicated that this task should run in the background and once run it immediately gives back command of the prompt to the user.

ab’s results are much more detailed than Siege’s results, personally I find some of ab’s results not that necessary, but it’s always good to have the flexibility to have all this data on hand.

Both ab and Siege are really handy tools with tons of functionality and a lot of neat little things that are beyond the scope of this lowly blog post(I don’t want to be that guy but seriously read the manuals, everything you might need its there). I really can’t decide to preach for just one tool, where one falls short the other one can excel, they complement each other well and should be enjoyed equally.

One word of warning: If you’re like me, once I got to know these tools, I started to get naughty ideas about its uses. Please refrain from using them against servers you’re not responsible, it’s considered impolite if not straight up illegal.

Colored Cat Output

Today, while checking some old scripts laying around my home directories I found myself “cat-ing” a ton of them. cat is mighty useful, but It could really use a colored output.

I found a small Python program called Pygmentize, which is nothing more than a syntax highlighter that supports a lot of programming languages and file formats.

If you’re on Linux and using apt you can find the package by the name of python-pygments.

Once installed, I just added a simple entry to my bash_aliases file:

1
alias ccat='pygmentize -g'

From monochrome to fabulous.

Hack a Search Engine: DuckDuckGo and My First Plugin

For about half a year ago I’ve been experimenting with the search engine DuckDuckGo, which main selling point is that they don’t keep records of your searches and value a lot the privacy of their users, unlike Google. For me this was interesting in the beginning, but what really sold me was their Open Source platform, which gives anyone the opportunity to contribute by building small functional plugins called Goodies.

These Goodies come in various flavors, the most basic ones are the regular Goodies, Perl scripts that may take some values, make some calculations and return a small snippet of information (basic arithmetic,spelling, word anagrams, among others).

The other one is called a Spice plugin, which works a lot like a regular Goodie, takes a couple of values with some trigger values as well, but the difference and advantage here is that this kind of plugin is able to make calls to external API’s, take the response, make a callback to the frontend and manipulate it using JavaScript to display it on the search results. Spice plugins make up for some of the most interesting live plugins on DDG, but they’re also the most difficult ones to develop, so I’ll try to show an example of one of the regular Goodies I made.

One thing first, developing a Goodie requires some knowledge on the Perl programming language, but It’s not something you can’t pick up quickly as you go or something really deep. I had no previous experience with Perl, save from some quick and dirty one-liners. But the examples and tutorial on the official Docs make it very easy for you to learn en come up with something fast.

The DDG platform has the advantage that it leverages the full capabilities of CPAN, you can download and use any supported module on CPAN, all this as long as each new module is indicated on the requirements file of the Goodie.

A Goodie file is divided into four logical parts: imports and dependencies, plugin info, trigger definition and query handle.

The Goodie starts as any other Perl program, with the definition of the program package which must follow the convention:

1
package DDG::Goodie::YourProgram;

Any Goodie should also import the DDG standard package and any other dependency:

1
use DDG::Goodie;

The plugin info is nothing more than the meta-data, developer information, type of plugin, description, repository url, etc.

Trigger definition is one of the key parts of the program, out plugin should respond to a set of predefined keywords. You can defined in what part of the search query should be located (start ,end, startend ,any).

1
triggers start => 'keyword'

The handle query is the core of our plugin, this is a subroutine which is called once one of the triggers defined is activated. Here you can pretty much do anything you need with your search inputs as long as the returned value is a string.

1
2
3
4
handle remainder => sub {
  return 'String: ' . $_;
  return;
};

Here we use the special variable $_ which stores the default input to the subroutine and we return the complete concatenated string (using . to concatenate).

The lonely return function just makes sure that our subroutine returns something even if its nothing (I’m aware that makes no sense :-).

After all this, all Perl packages on DDG need to return true when loaded correctly. So you need to add the following:

1
1;

Yes, I wasted a whole code block on that, but its necessary.

And thats it! Obviously this wont work on it’s own. DDG has its own platform for testing plugins of all kinds, but that goes over the scope of this poor article.

DDG’s platform has some excellent documentation which covers every detail about the development of plugins and how to deploy them. Most of their work is at GitHub, and from personal experience, the community is really friendly and helpful. They made my first contribution a breeze.

They also have a community page where people can contribute on non-coding tasks by giving ideas on new plugins, feedback and more.

This article may seam preachy, but this project made me very exited because it was one of the firsts OSS projects I’ve ever contributed on and it was such a joyful experience that I wish to keep doing it for a long time.

You can checkout the Goodies repo at Github, for some examples.

Hofstadter’s Law

It always takes longer than you expect, even when you take into account Hofstadter’s Law.

Douglas Hofstadter Gödel Escher Bach: An Eternal Golden Braid

Grep for the Clueless

The first time I had the pleasure of working in a *nix-like environment with no graphical interface was a daunting task. All the comfort of a pointer and the cute little icons was gone, all you have before you is a cold and menacing black windows with a blinking cursor.

Once the initial shock was gone and I needed to actually get shit done was when I started to learn properly how to move around and use all the tools available.

I was hooked.

Daily use and constant research made me feel comfortable, but if there was one thing that to this day is still a fascinating is the grep program and how it integrates seamlessly to the output of everything else. Later I learned that this was more of a Unix thing.

So I want to share some of the little things that helped on my constant and never-ending path to suck less at *nix.

The Super Basics

The basic syntax used on the grep program is

grep [options] regexp [files]

Where [options] represents all the flags which you might want to include to manipulate the results of the program.

regexp is the string of characters or regular expression the program needs to match.

And finally, [files] represent well…the files where you want to look for that particular regexp.

If I want to look for a word on a specific file, I would have to use grep in its most basic form.

grep conf Rakefile

This will print every line that matches the given pattern (“conf”) inside Rakefile.

You need to look for more than one match? No problem, just append a pipe (|) character between each match in the regexp argument.

grep 'warning\|error\|critical' /var/log/messages

Flags

There are tons of flags you can append to the grep command get the exact output we need. Most of them manipulate the results gathered from the search pattern, others define conditions to the pattern searching (ignore some word, search recursively, etc.).

Just to name a few.

-c : Instead of listing every match, just count the results and print it.

grep -c 'import' AbstractSingletonProxyFactoryBean.java

-l : If grep is applied to a certain directory or a set of files this flag only prints in which files the pattern matched.

grep -l '^#include' /usr/include/*

-r : So you have a bunch of files where you want to search, but you don’t want to apply grep to each one. You can recursively search in a directory for a pattern in all their directories.

grep -r 'ERROR' /usr/local/tomcat/log/

-v : If you need to dig into a file where theres a pattern that repeats in every line but you need to find where this pattern doesn’t appear.

grep -v 'conf' Rakefile

-w : Grep by default always tries to match the pattern even if its between other words (“conf” matches in “config”,”configs”,”ifconf”). If you need to force grep to just select the lines where the pattern matches the word do:

grep -w "conf" Rakefile

Piping

Like any good Unix program, grep supports pipping between different programs that share a common text output. Say, you’re tailing in real time a log, but you want to print only the lines that contain a certain tag.

tail -f MyLog.log | grep DEBUG

A Little Tweaking

Some more color in your terminal its always a good thing, it helps highlight the things that matter in a sea of white garbled text. You could pass the flag –color (–colour for our British friends) every time you use it, but thats annoying. Instead, add this to your shell alias configuration (bash_aliases if you’re using Bash).

alias grep='grep --color=auto'

This adds out color flag in an alias every time we use it.

This isn’t intended to be a full fletched guide on grep, but if you need more knowledge on the subject you can always check the man page on grep.

First

After days of inner debating I’ve decided to finally start writing again. This is like the 3rd blog I’ve ever started and hopefully I’ll keep it around for a little longer.

This blog will be dedicated to my ramblings about coding and everything in between(languagues, frameworks, technologies, etc.).

I’m no expert on the subject, but I really like learning new things and I would love to share all the little things I learn everyday, so If you see something wrong in this blog (besides my shaky english) you’re free to point it out on the comments section.

Thank you :-)